As a business owner, you likely already have a million things on your plate – but have you considered the importance of claiming your Review Platform profiles? Not to add yet another thing to your to-do list, but this one is really important! Hint: it will help customers find you!
Having your business claimed in review platforms means that customers can easily find you. It also helps search engines provide information about your business. If you aren’t already sold on why you need to claim your review platform profile, here are 5 big reasons.
Plus, learn how to claim your review platform profiles!
- Show you are a real business – When you claim your profile, it shows search engines that you are a legitimate business.
- Give your business authority and establish trust – This is very important for ranking in searches. Having a claimed review platform profile shows search engines that you are an authority in your niche or specific industry. You also establish trust. This helps with rankings and can bring in more referrals (aka customers).
- Easy to find information about your business – Make sure that the information in the review platform profile is correct, up to date, and not duplicated. If customers can’t easily contact you, you could be losing business.
- Engage with customers – A huge benefit of claiming your review platform profiles is the opportunity to engage with your customers by responding to reviews. How you engage with reviews leaves an impression with potential buyers too. Plus, you have the ability to flag or remove fake reviews – limiting the damage they may inflict.
- Improve SEO – Improving your business’s ability to rank through SEO is so important. When you claim your review platform profiles in Yelp, Google, or Bing, you create links back to your website and social media accounts. This helps you rank higher in search results and build your social media.
To better cement your foothold as a reputable business, make sure you are claiming your review platform profiles for your business in all applicable platforms like Yelp, Google, Trip Advisor, and Bing. Here’s how!
Table of Contents
1. How to Claim Your Google My Business Profile
There are 16 steps to take to claim your business on Google My Business.
2. How to Claim Your Bing Places Business Profile
There are 8 easy steps to claiming your review platform profile through Bing Places.
3. How to Claim your Business on Trip Advisor
There are two ways to claim a listing on TripAdvisor.
4. How to Claim Your Business on Yelp
There are 7 steps to claim your business on Yelp.
5. How to List Your Campground on Campgroundreviews.com
There are 5 easy steps to get your campground listed.
6. How to List Your Campground on Campendium
There are 6 easy steps to list your campground.
How to Claim Your Google My Business Profile
There are 16 steps to take to claim your business on Google My Business.
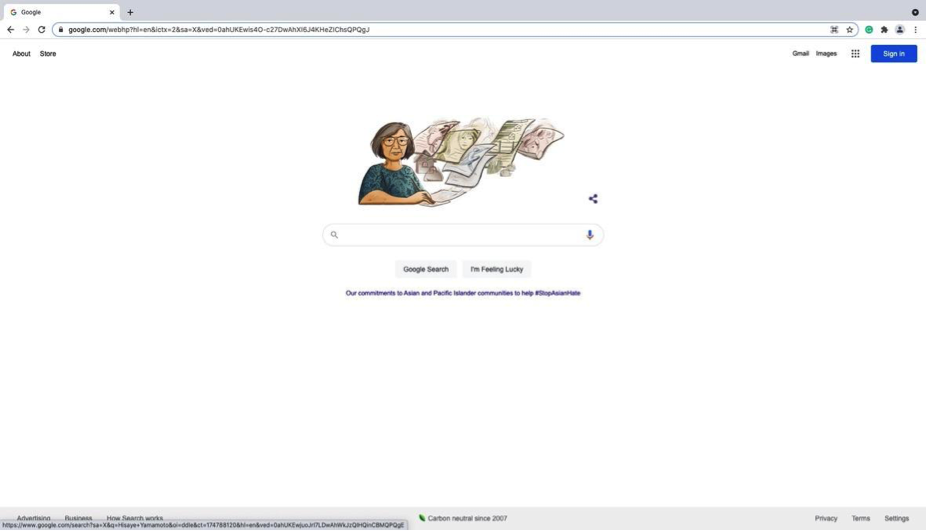
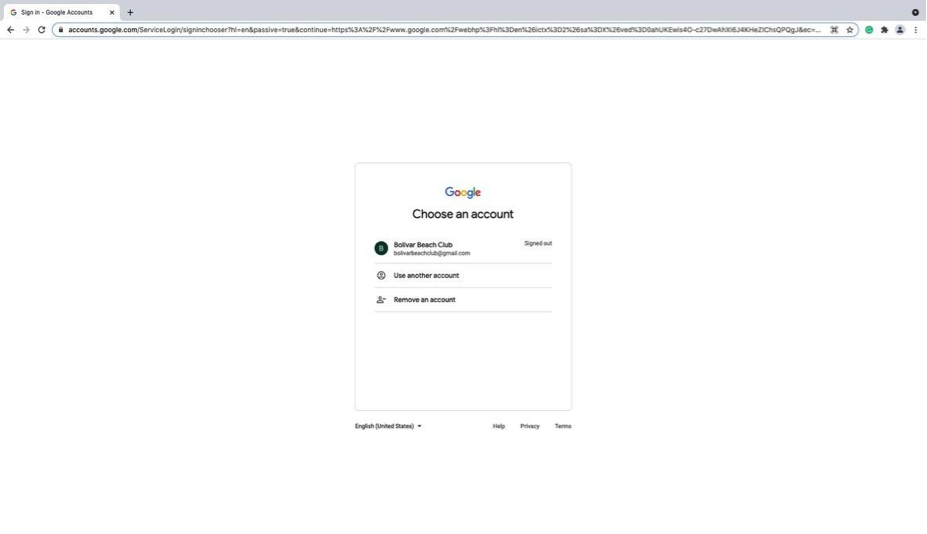
Step 1: Log in to Google or create a new account. To log in or sign in, click the blue “log in” button on the upper right-hand side of the browser.
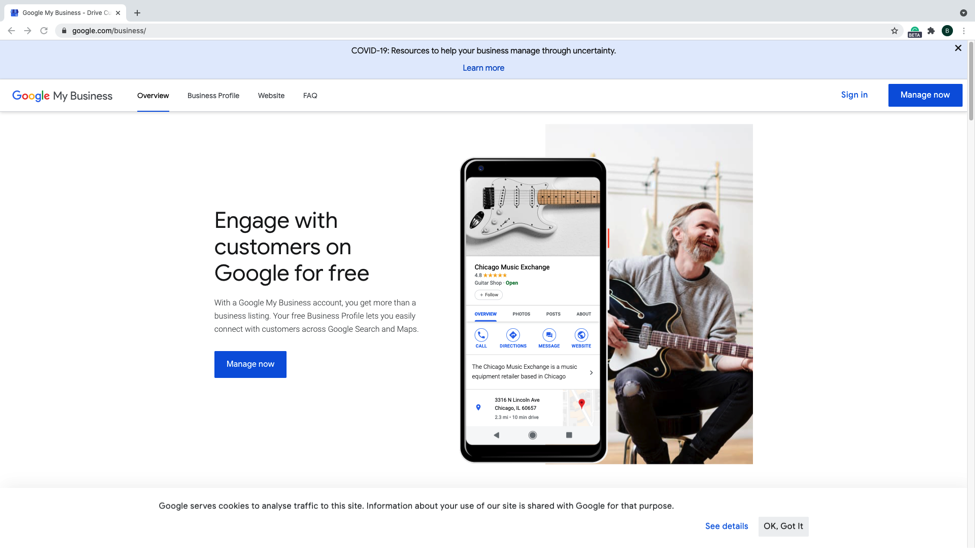
Step 2: Go to https://www.google.com/business/ then click on manage now.
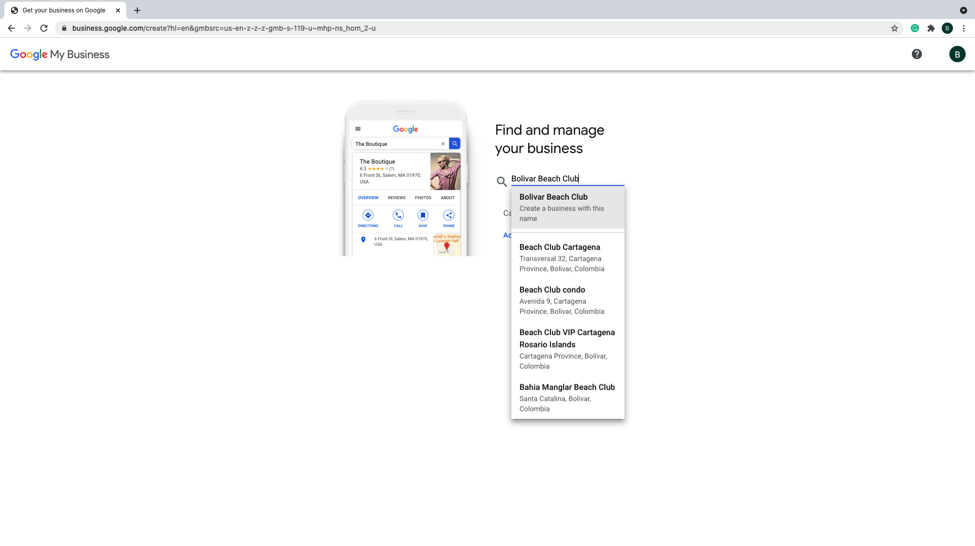
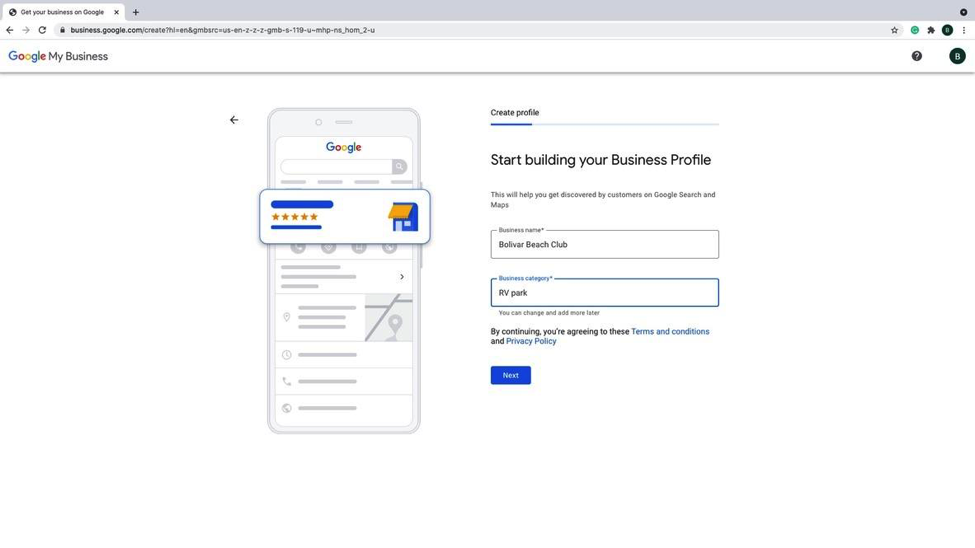
Step 3: Type in Company name. If it doesn’t appear in drop down, click on top option to “Create a business with this name”.
Step 4: Make sure the company name is spelled correctly and then select the proper business category below.
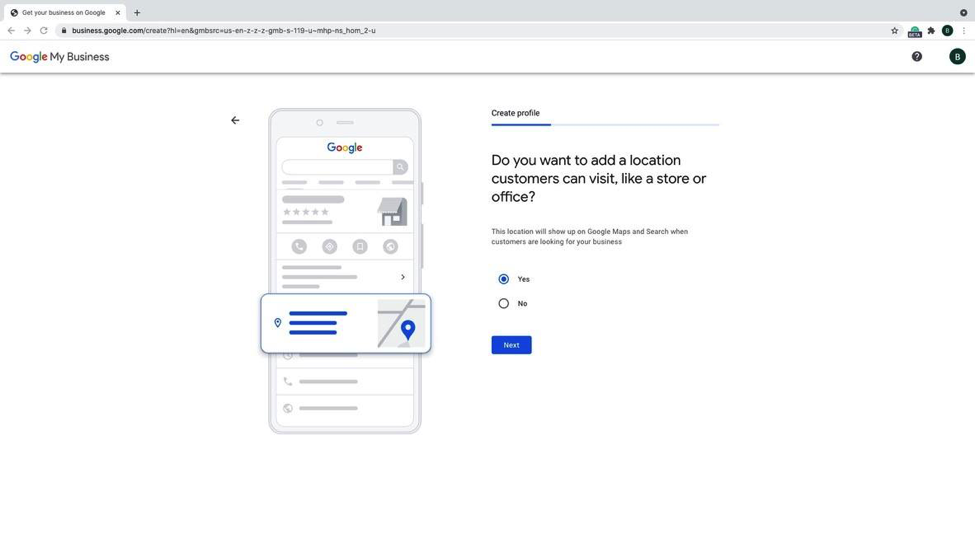
Step 5: Add your business’s location. Click yes, then click next.
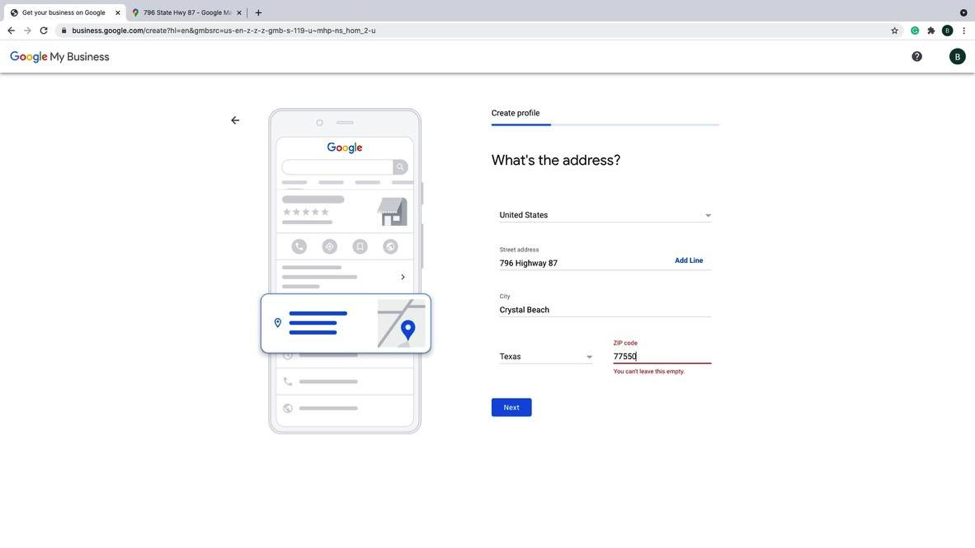
Step 6: Enter your business’s address into the appropriate fields.
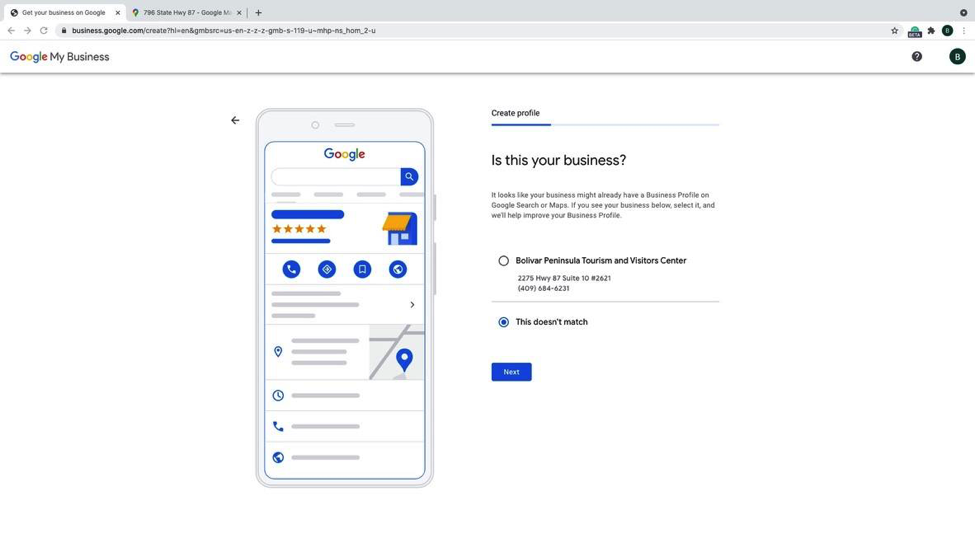
Step 7: Confirm your business. In this case, the business listed does not match our business we are creating for, so we click this doesn’t match and click next.
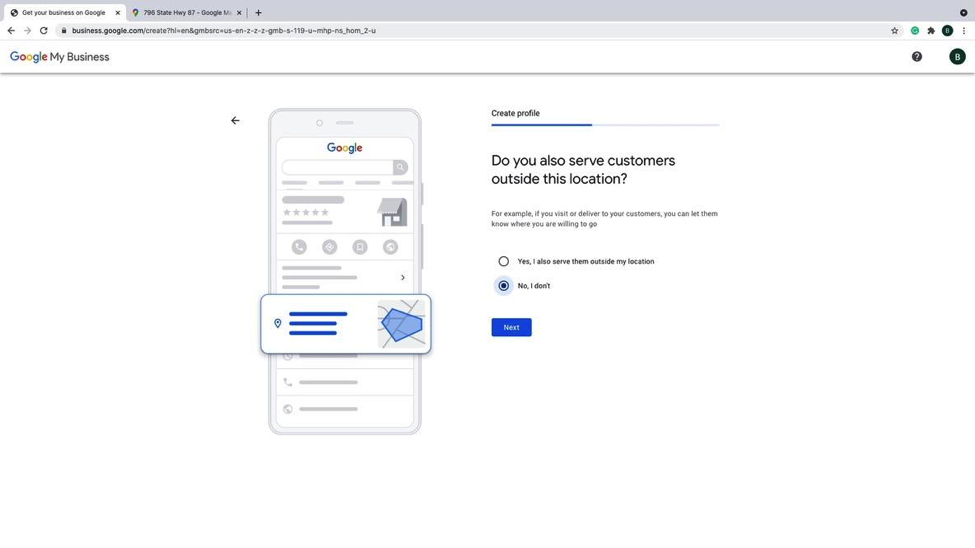
Step 8: Answer the question accordingly to your business. In this case, we say “No, I don’t”.
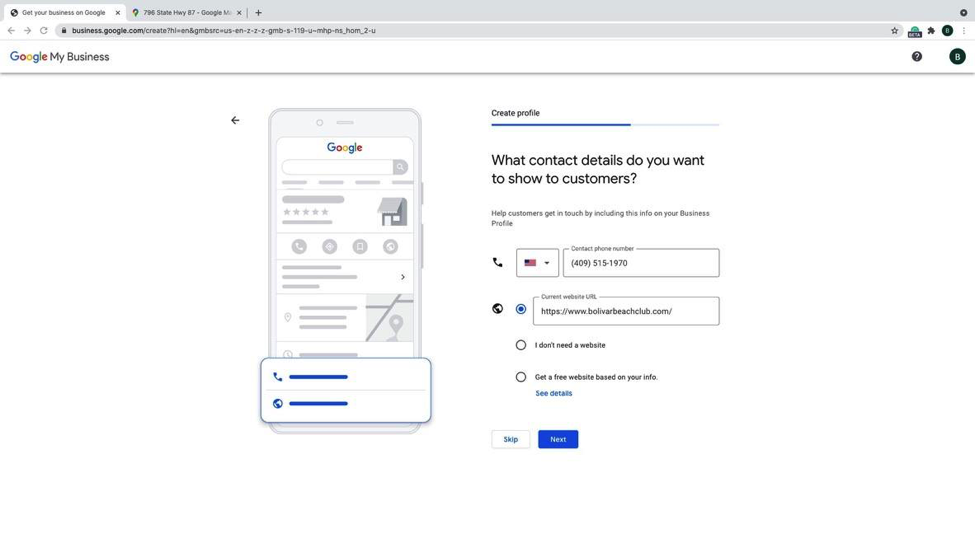
Step 9: Enter in company phone number and website.
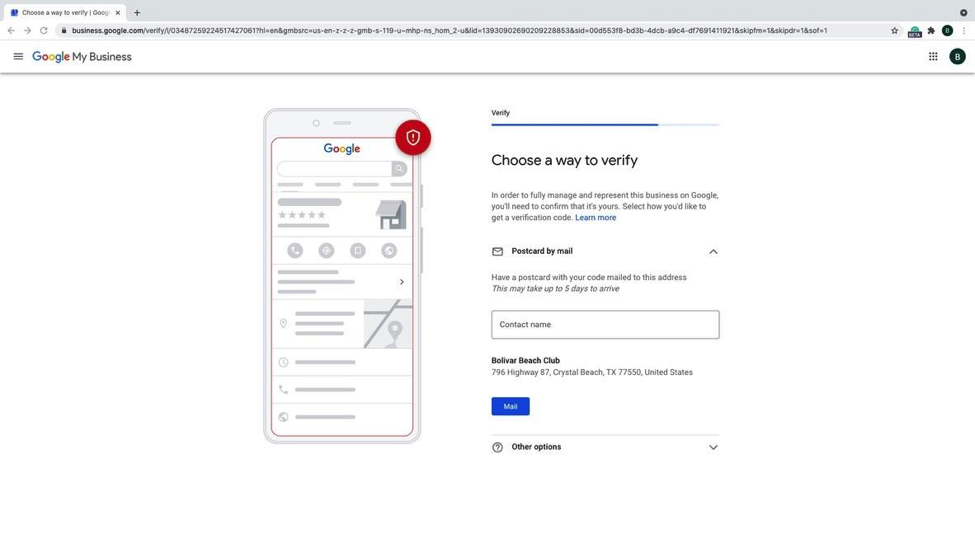
Step 10: Verify your business.
Google will ask you to verify your business by either calling you or asking you to enter in a pin number from a piece of mail they will send you. Make sure the address is correct and put down a contact name (mail may take up to 5 business days for it to arrive). You can also verify later, but your business will not be shown until it is verified.
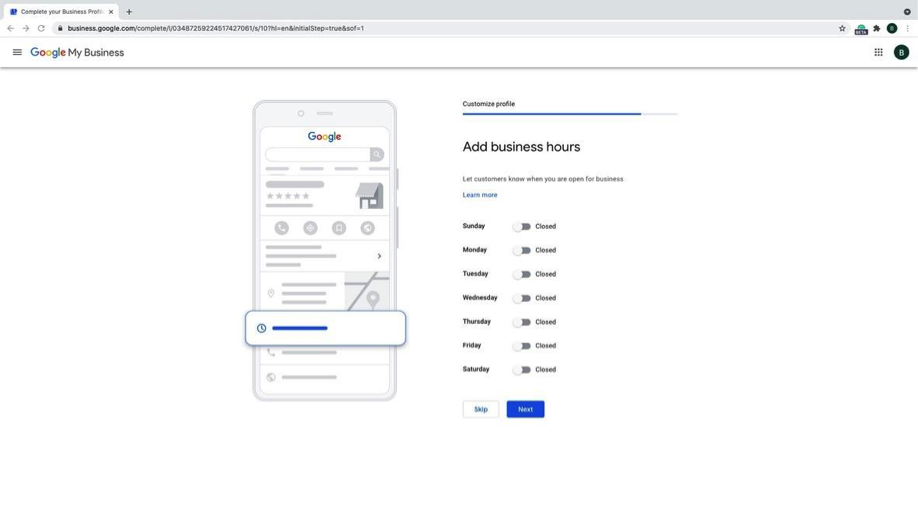
Step 11: Enter the Hours of Operation for your business. If this does not apply to your business, you can choose to skip this step.
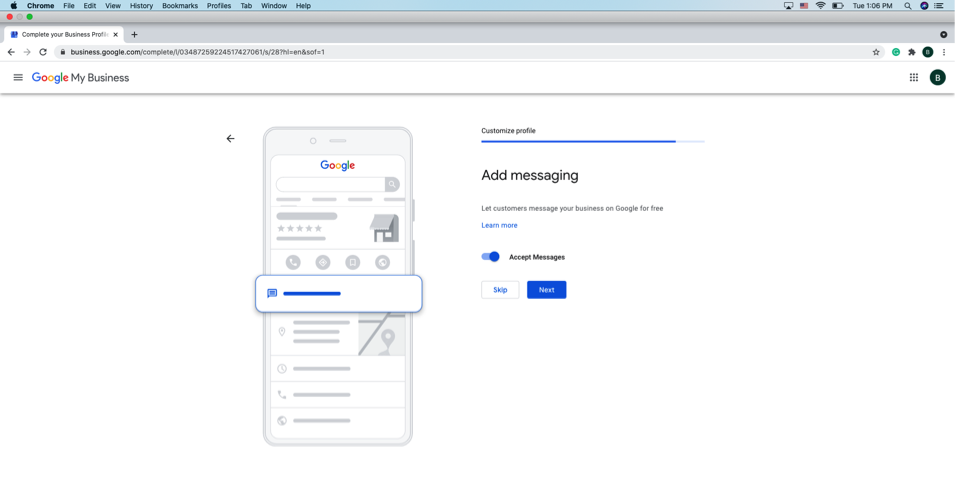
Step 12: Choose to accept messages for your business.
You can either accept or decline this service. If accepted, customers will be able to message you from google to your business profile where you will be able to receive notifications and reply to them.
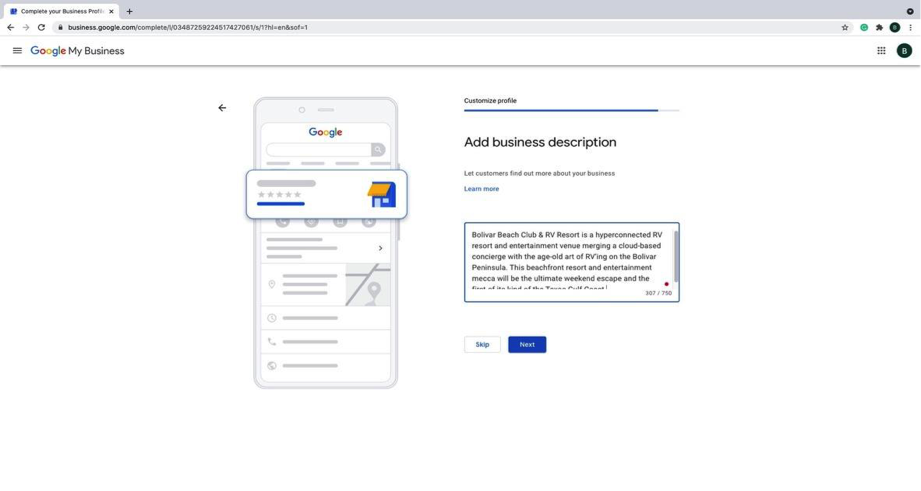
Step 13: Add a description to your business page.
This will allow customers to gain a better perspective of your business. You can choose to skip this step, but it is highly recommended to add in a couple of sentences.
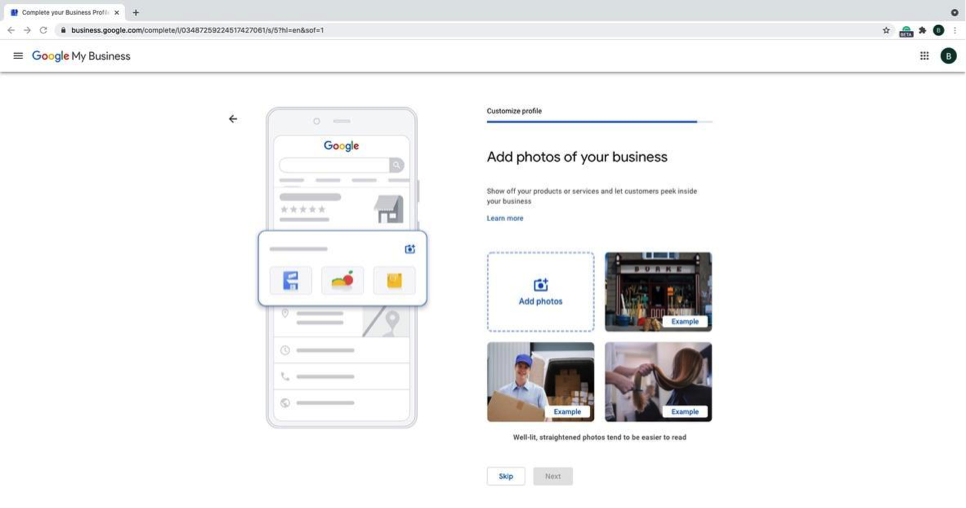
Step 14: Add photos of your business.
This will also help customers better scope your business. Some photos we suggest adding are one of your store front or building, street sign, and some complimentary pictures of your space or what you offer.
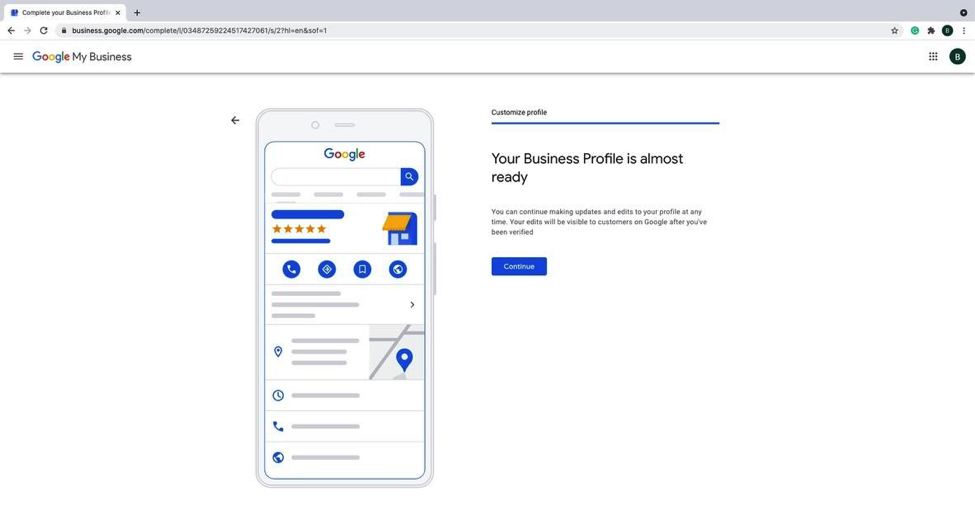
Step 15: Set up complete!
After your business has been verified, it will be visible to customers and users on Google. Click “next” to go to the Google My Business Dashboard.
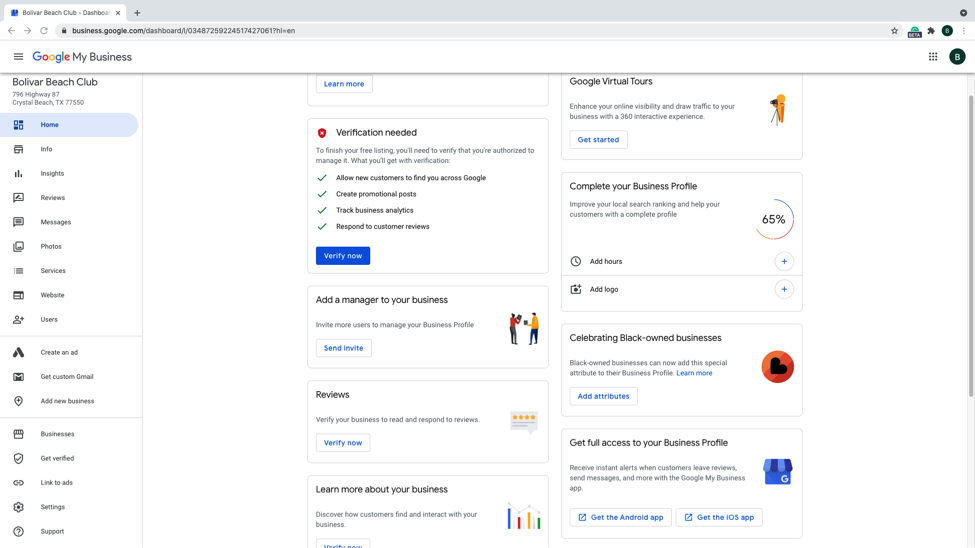
Step 16: Welcome to the Google My Business Dashboard.
Here, you can manage your business and what people are able to see about it on Google. Check out analytics, add photos and logos, and see and respond to reviews people are leaving!
How to Claim Your Bing Places Business Profile
There are 8 easy steps to claiming your review platform profile through Bing Places.
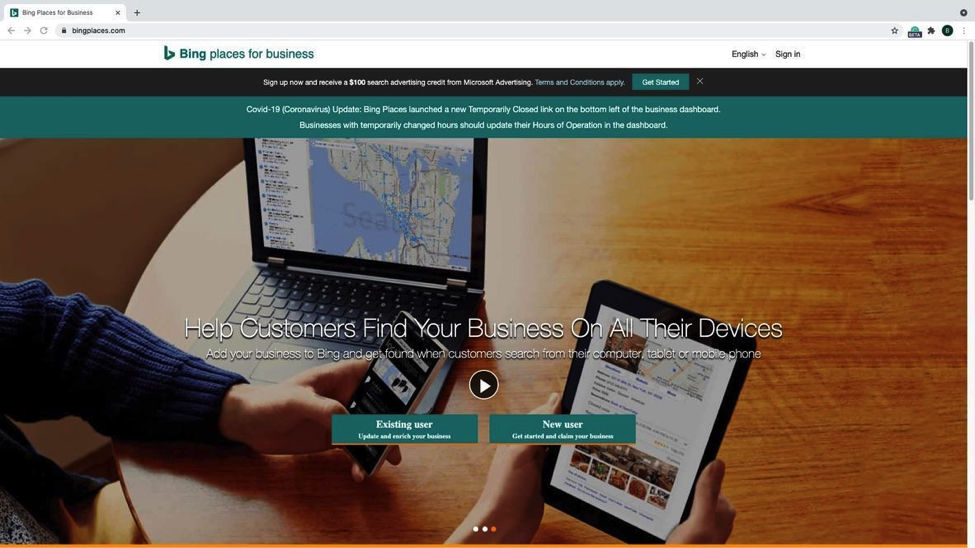
Step 1: Go to https://www.bingplaces.com/ and click on “New User” near the middle of the screen.
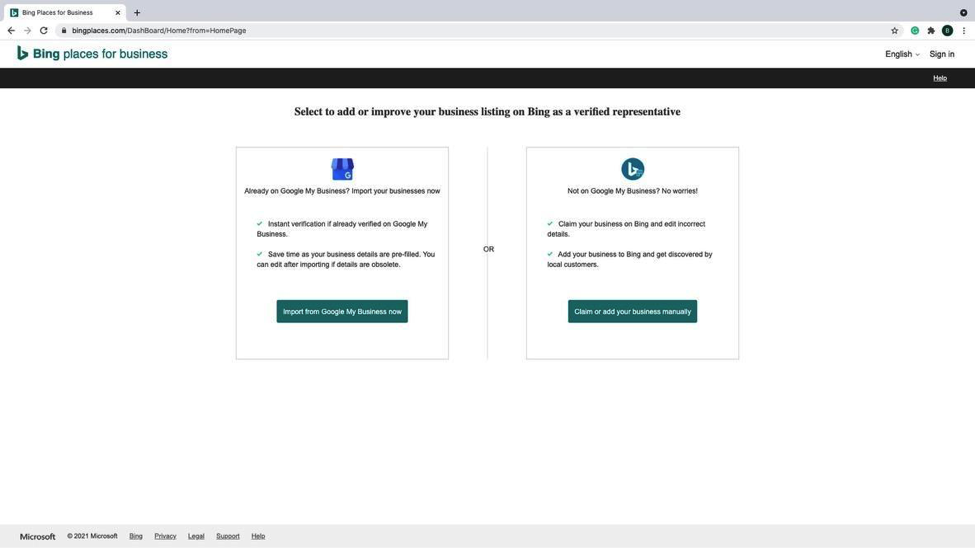
Step 2: Since we are already on Google My Business, we will select that option to save time and import all the information.
Click “Import from Google My Business now”.
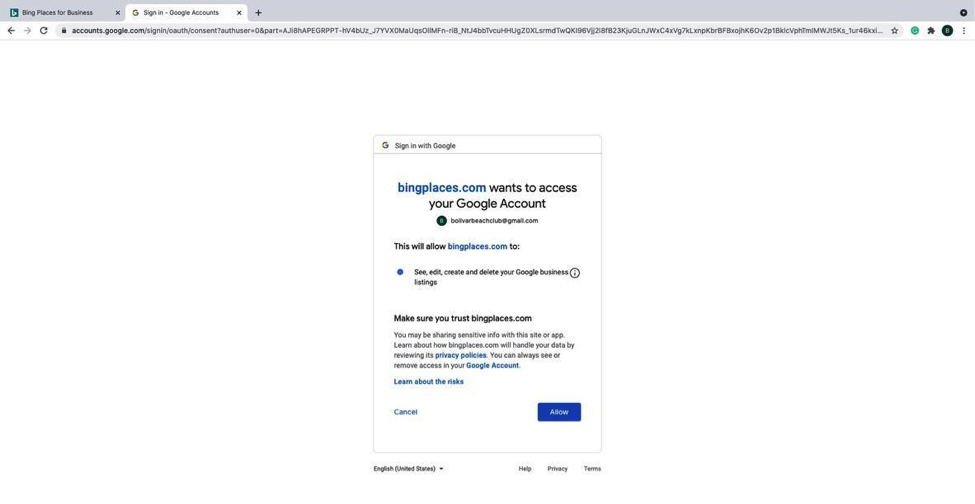
Step 3: We want to allow Bing Places to access the account and gather the business information.
Click “Allow”.
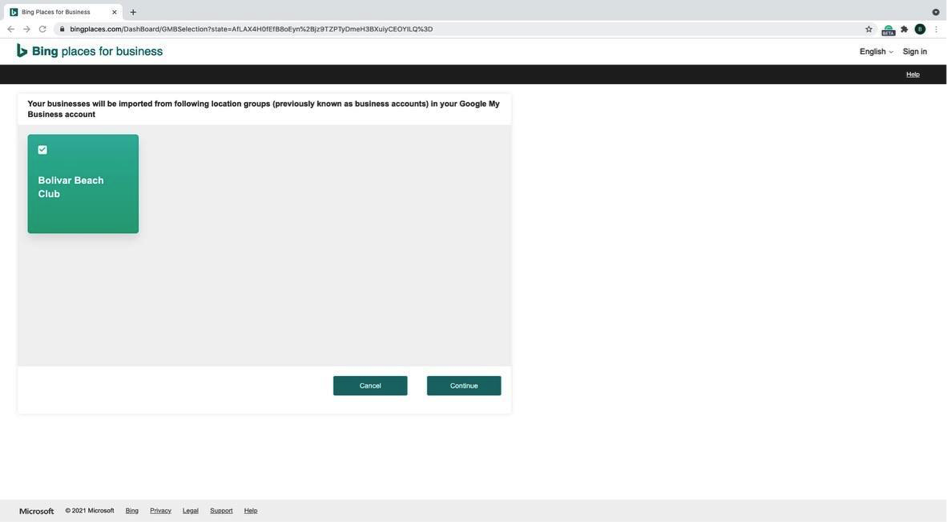
Step 4: If done correctly, the business should show up like this. Make sure the correct business profile is selected and click “Continue”.
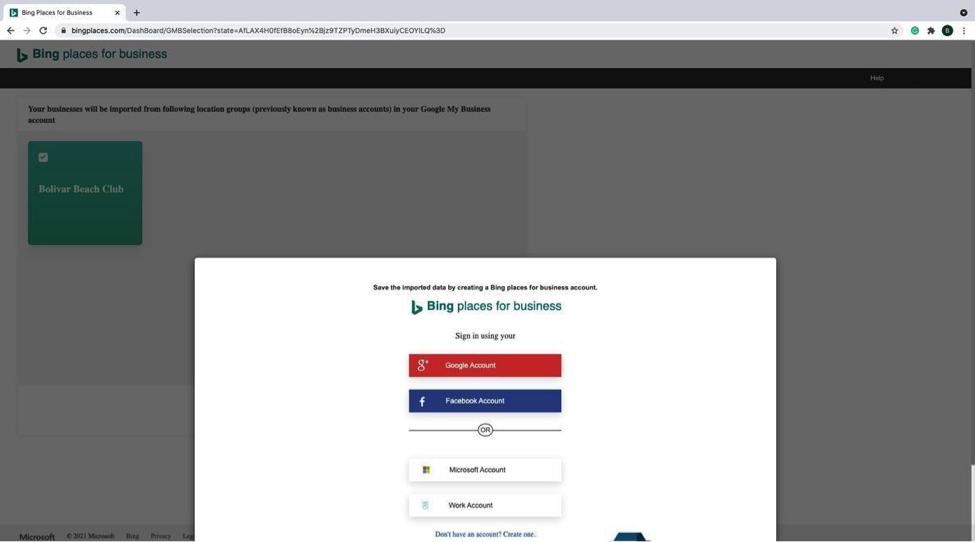
Step 5: If this window pops up, we will sign in using our Google account details that we had previously created.
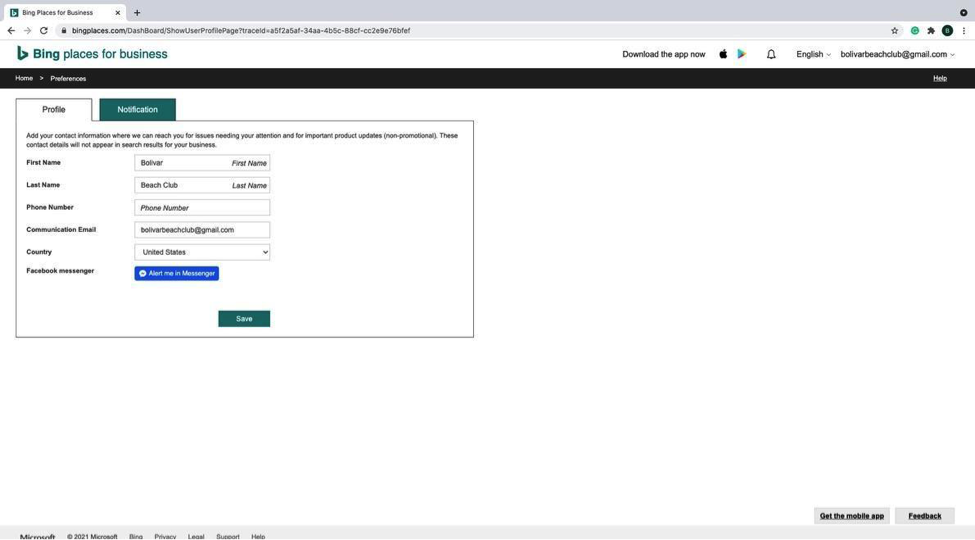
Step 6: Make sure all your business profile information is correct and then click “Save”.
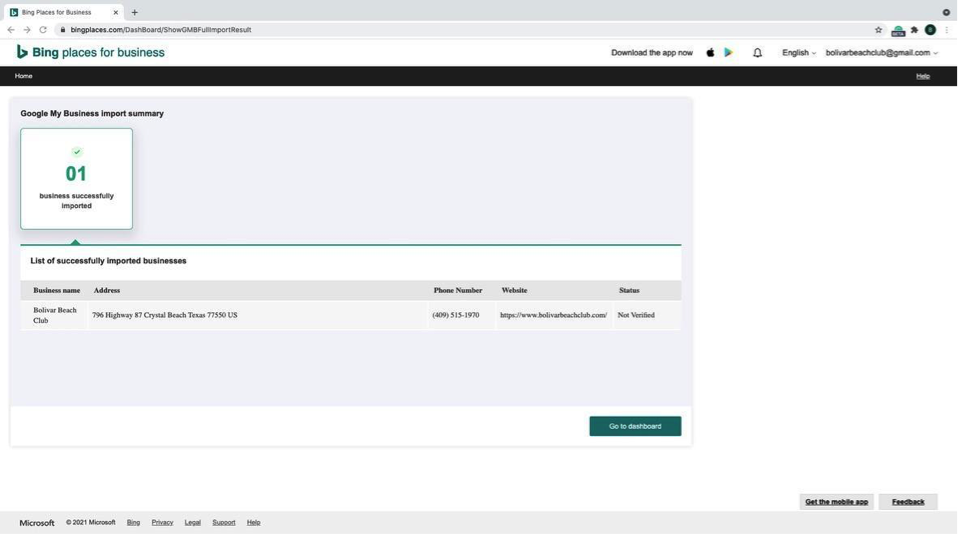
Step 7: The next page you will see is the import summary from Google My Business. Verify that all the information is correct then click the “Go to Dashboard”.
Step 8: Welcome to your dashboard! Here you can manage everything about your business page on Bing Places. From here you can update your business hours, add photos, and much more.
You can verify your business separately from Google, but once your Google My Business is verified, your Bing Places will update automatically.

How to Claim your Business on Trip Advisor
There are two ways to claim a listing on TripAdvisor.
- 1. If your business is already listed and pops up in search results, then you need to claim it.
- 2. If it doesn’t show up on TripAdvisor, then you need to submit it as a new listing.
A. Submitting a New Listing
There are 5 easy steps to submitting a new listing.
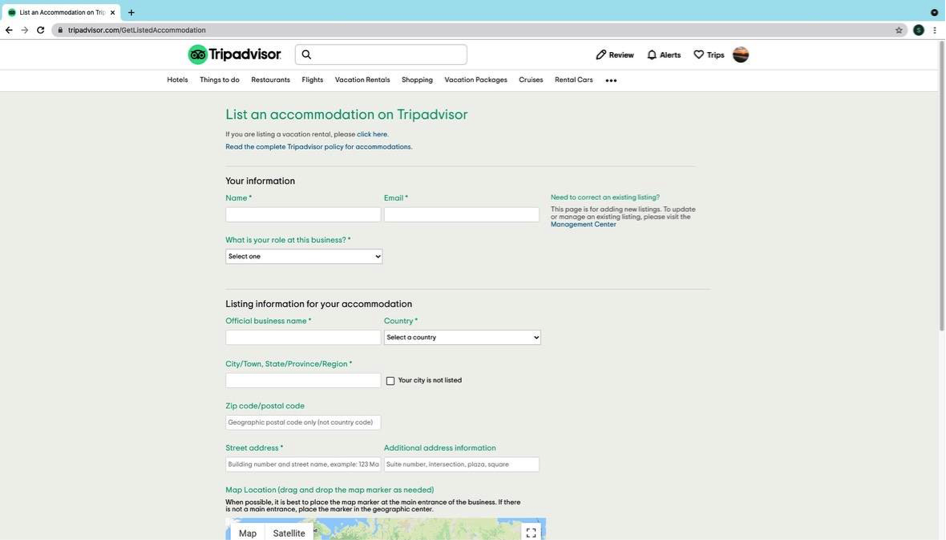
Step 1: Go to https://www.tripadvisor.com/GetListedNew. We will be selecting “hotels” as our business type.

Step 2: Enter in the proper information for your business in the spaces provided on the site. Verify that everything is correct before proceeding to the next page. Make sue that the pin on the map near the bottom of the page is in the correct location. When you verify that all the information is correct, proceed to click the green “next” button at the bottom of the page.
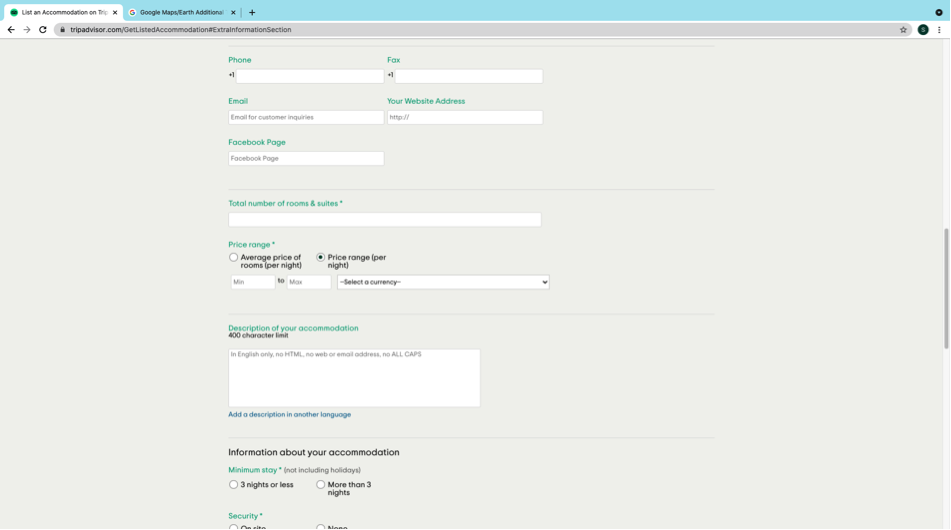
Step 3: Continue to enter in information about your RV Park or Campground. Ensure that all the information you are listing is accurate.
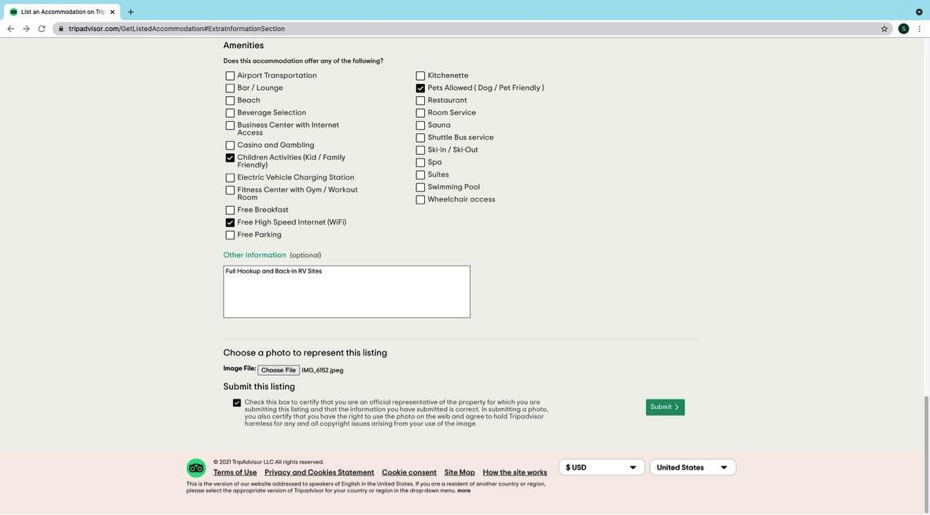
Step 4: Before you Submit, make sure all the information is correct, and that you choose a picture to represent the listing.
After that, you can click on the green “submit” button to proceed and submit the listing.
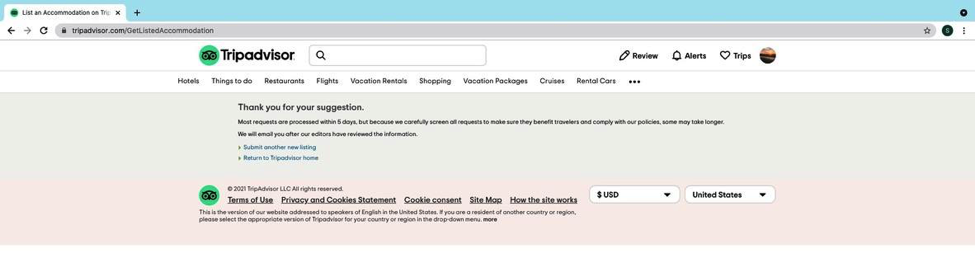
Step 5: Trip Advisor will take up to 5 days to look over the listing and approve it. You will receive an email after it has been reviewed by Trip Advisor.
B. Claiming an Existing Listing
There are 7 easy steps to claiming an existing listing on TripAdvisor.
Step 1: Log into https://www.tripadvisor.com/Owners.
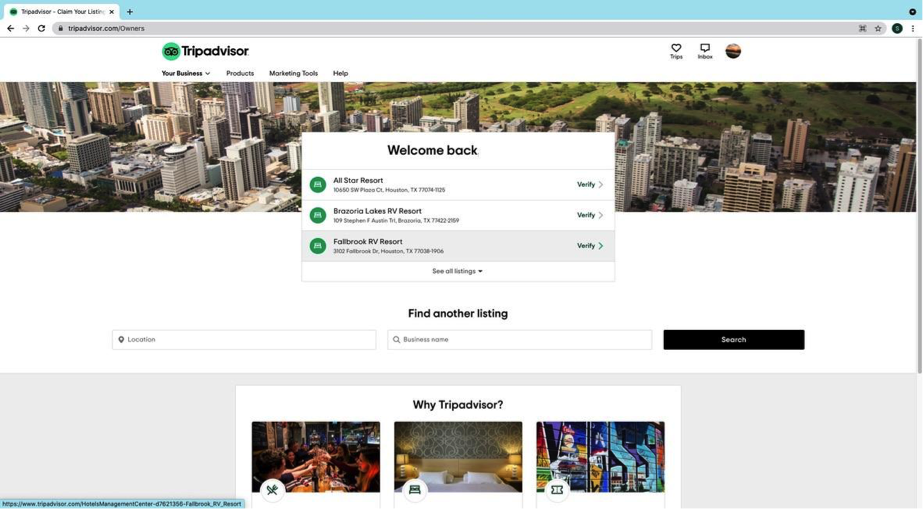
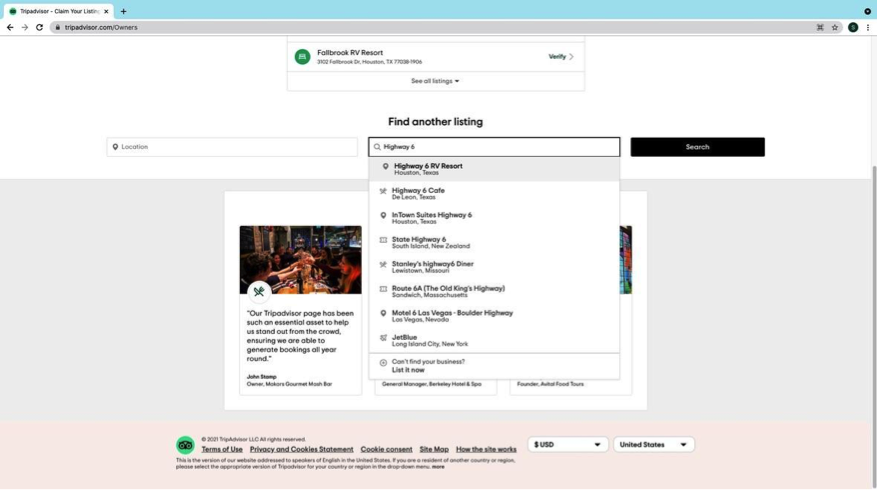
Step 2: Search for your property or business on Trip advisor.
If you’re having a hard time finding it, make sure you have the location in the box next to the search bar correct.
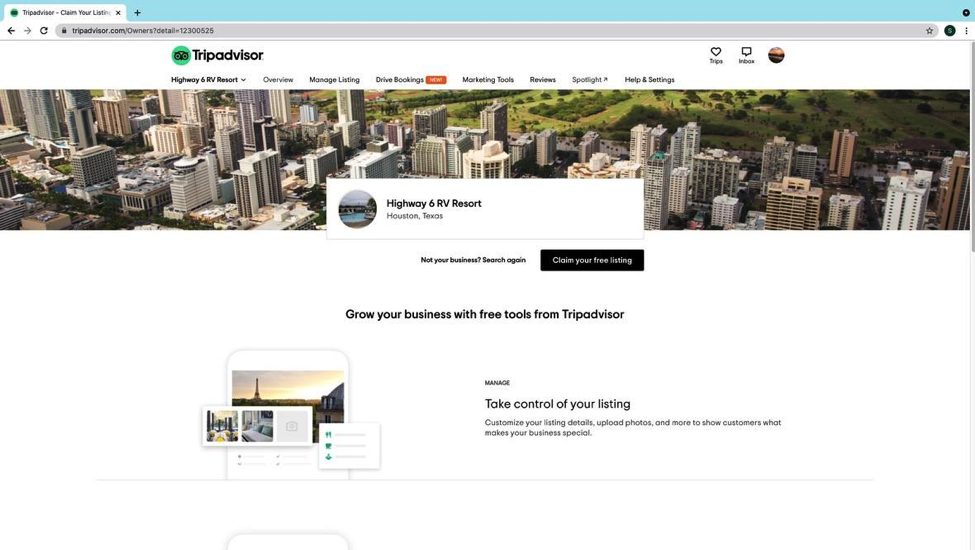
Step 3: Once you find your listing, click on the “Claim your free listing” button.
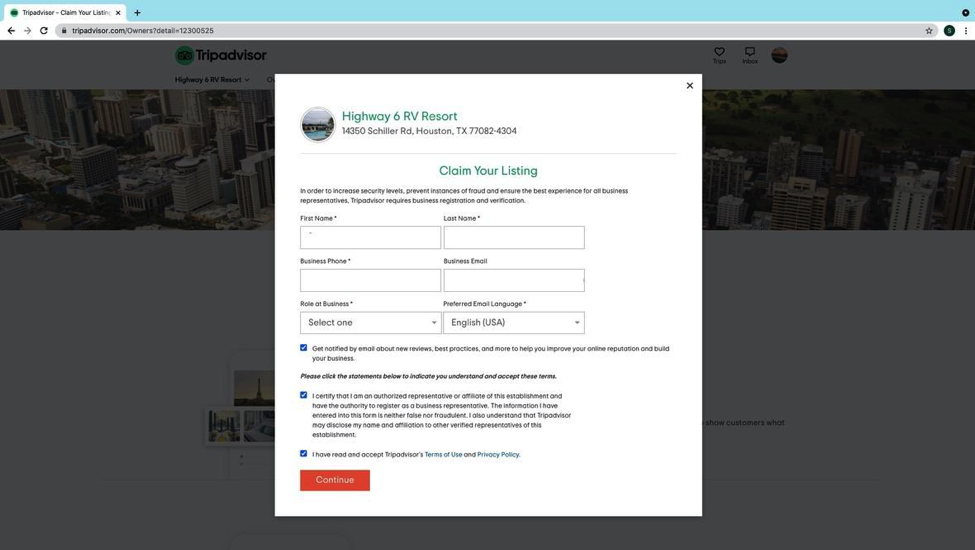
Step 4: Enter in all the proper information that TripAdvisor is requesting.
This should be mostly pre-filled, but there will be a couple spots for you to enter in some information.
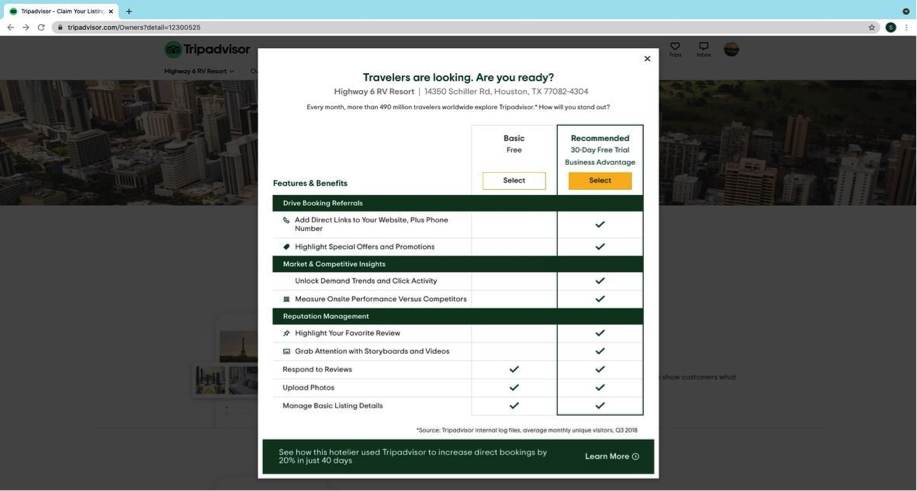
Step 5: Select what version of TripAdvisor you would like to continue on with.
Business Advantage will give you more advantages and features like linking your website, phone number, add special offers, and ads for $40 a month or $499 for a 12-month subscription. The free version will give you basic features of the page like being able to manage the hours, reply to reviews, add photos, add amenities, and more.
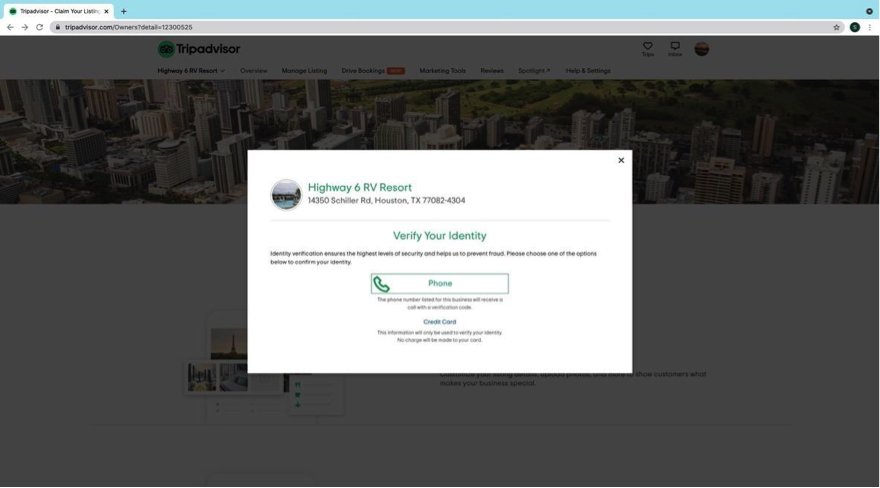
Step 6: Verify your business.
You can either choose to receive a phone call to the number listed for the business where you will get a verification code, or you can enter in your credit card information (Trip Advisor will not charge your card for doing this).
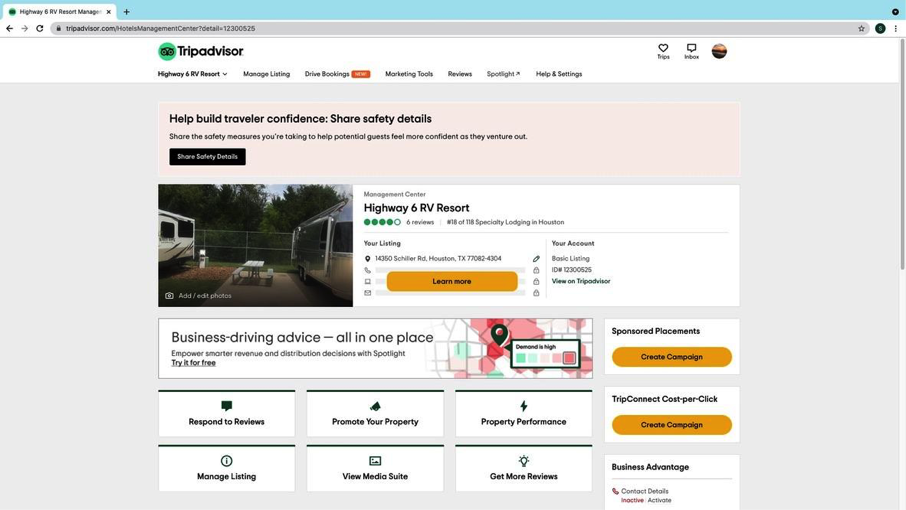
Step 7: After verification, you will be taken to the Management Center.
This is where you can manage the information, promote it, and add business advantage if you decide to add it on later. You can also see all the reviews people have left on your listing and respond to them if you want.
How to Claim Your Business on Yelp
There are 7 steps to claim your business on Yelp.
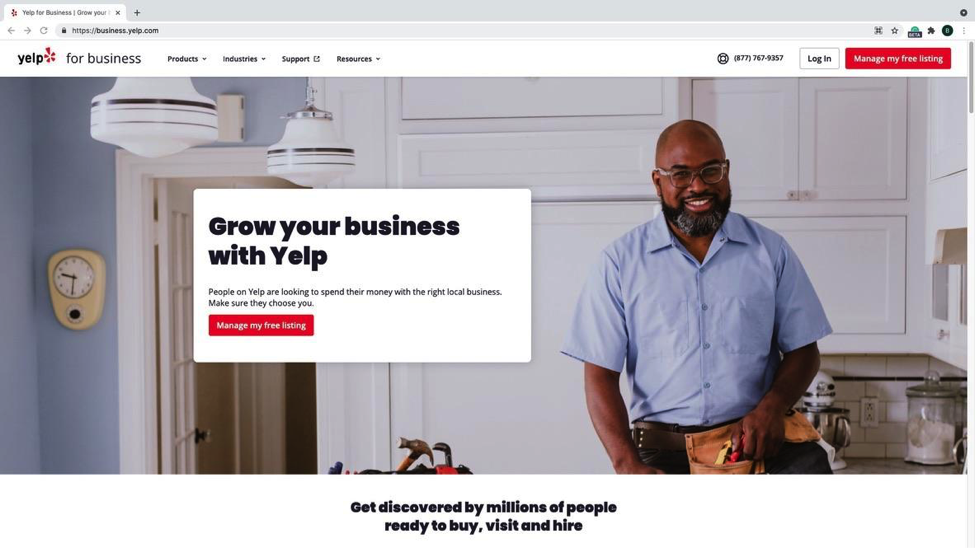
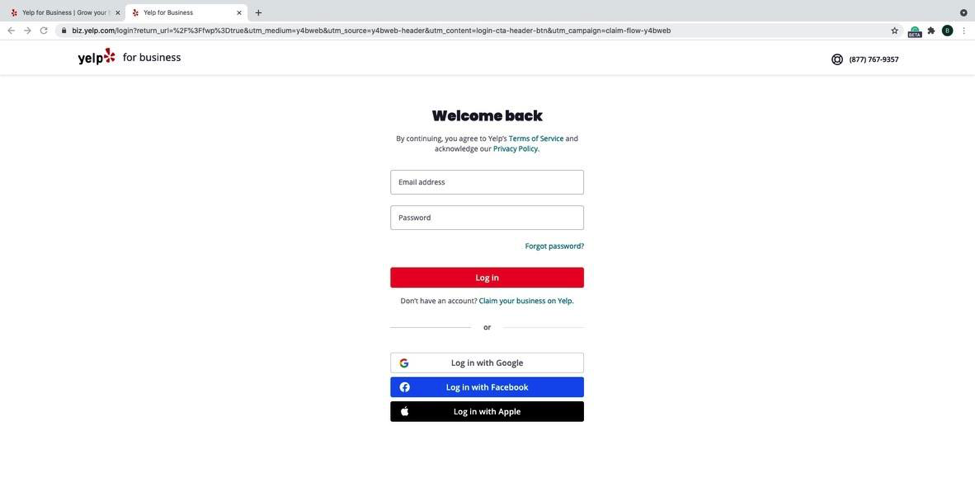
Step 1. Go to https://business.yelp.com/ and click “log in” in the upper right hand corner to begin.
Step 2: Log in with your email and password.
Since this is our first time logging into Yelp with this account, we will click on “Claim your business on Yelp”
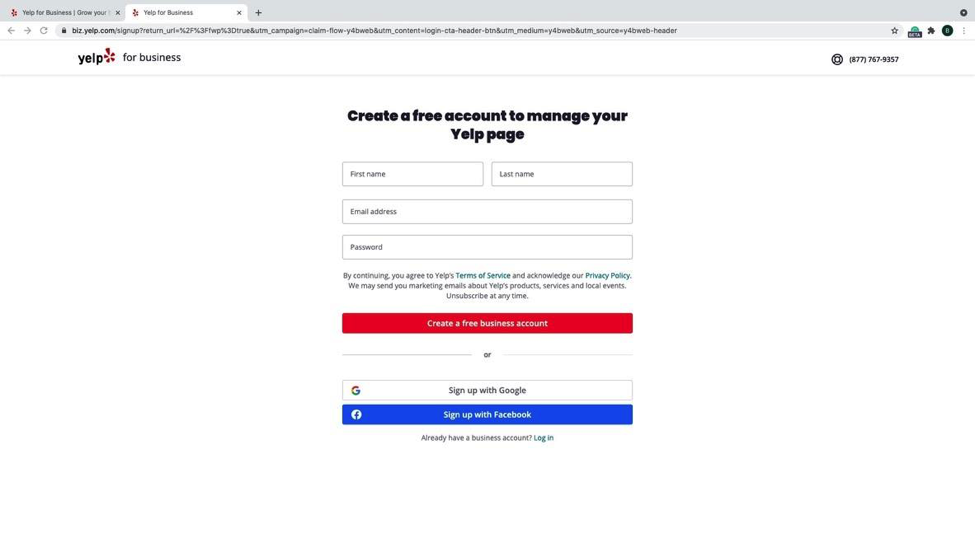
Step 3: Log in with the Google account we created with the Google Business Index.
If you have a separate email you would prefer to use, enter your information in to create an account.
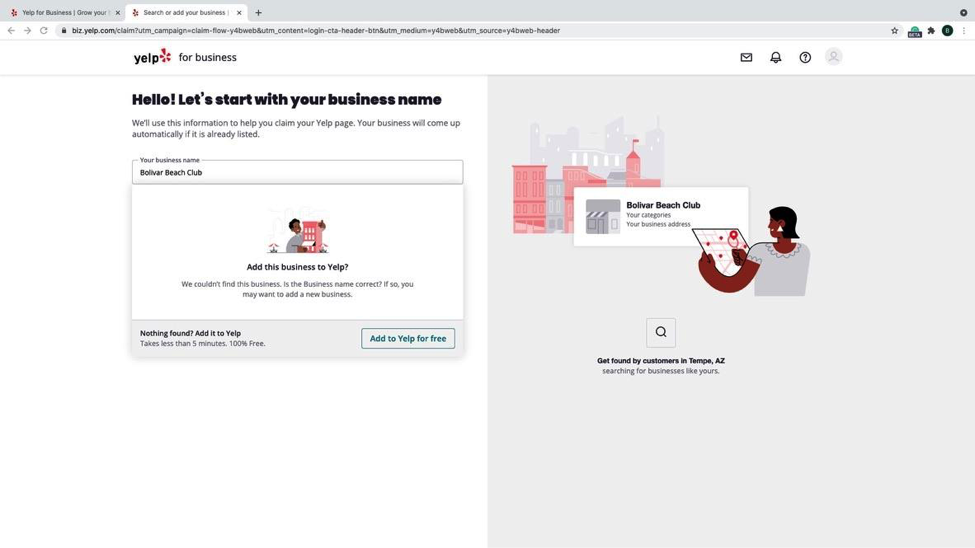
Step 4: Enter in your business’s name.
If it doesn’t appear in the drop down, click the “Add to Yelp for free” button
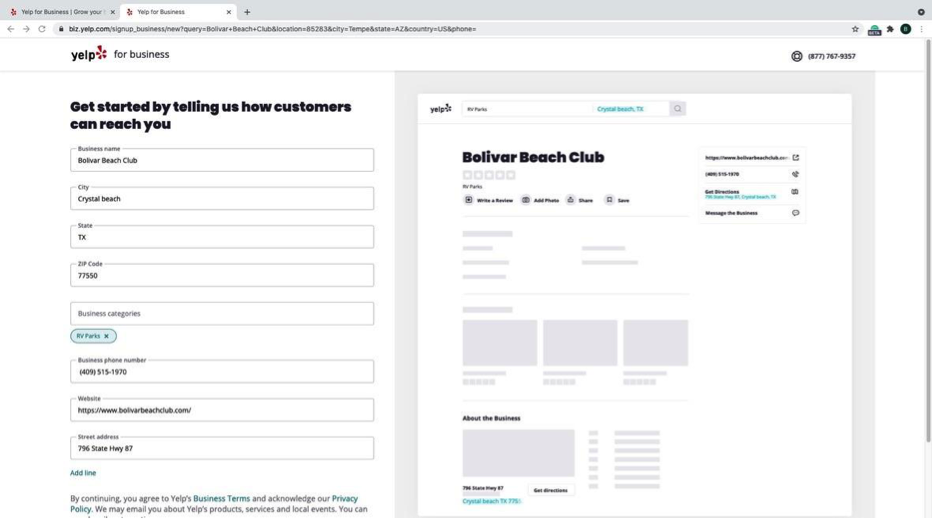
Step 5: Enter in your business’s information in the areas provided on the page.
Also make sure you enter a category or two for business categories. As you enter in information, you will start to see your page come together on the right hand side of the screen.
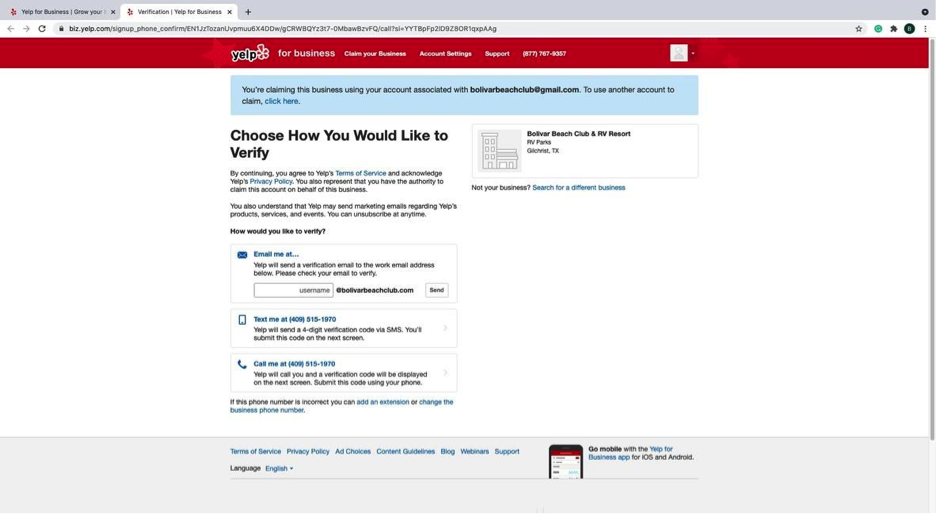
Step 6: Verify your business.
Yelp will ask you to verify your business by either having you verify through email, text, or phone.
Note: Your email address must match the URL address of your website i.e., yourname@yourbusinesswebsite.com. If it does not, you will not be able to receive a verification email and must opt for the phone option. It will dial only the phone number on your business’ website. You cannot change this to another number to verify your business.
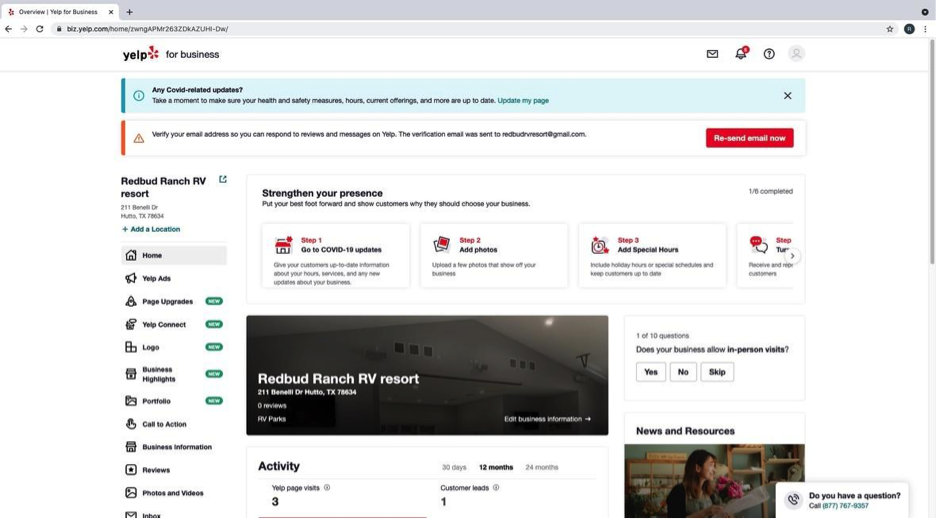
Step 7: Manage your listing.
After verification, you will be taken to your business home page, where you can edit information about your business, add photos, reply to reviews, and more!
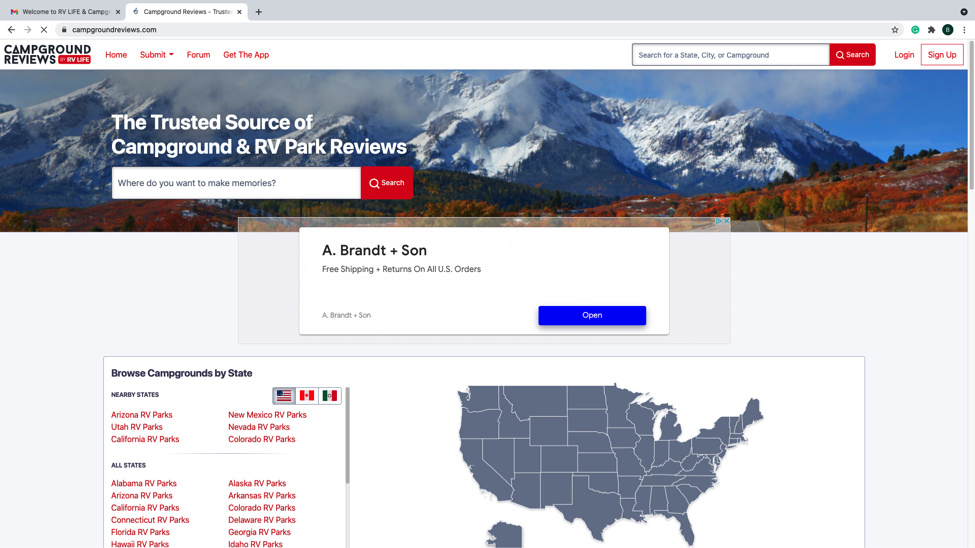
How to List Your Campground on Campgroundreviews.com
There are 5 easy steps to get your campground listed.
Step 1: Go to https://www.campgroundreviews.com/ and either login to your account or sign up for an account.
Step 2: Scroll all the way to the bottom and click on “Add a Park” if your park is not currently listed on the site.
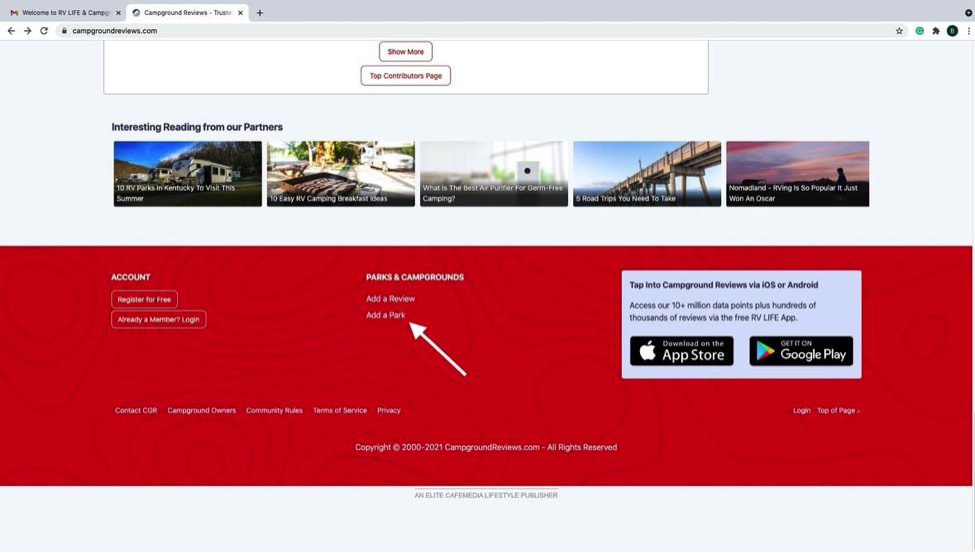
Step 3: Fill out the form on the website to get your campground or RV park listed on the site.

Step 4: After successfully filling out the form, you will be taken to this screen.
Your campground/ RV Park submission is now under review.
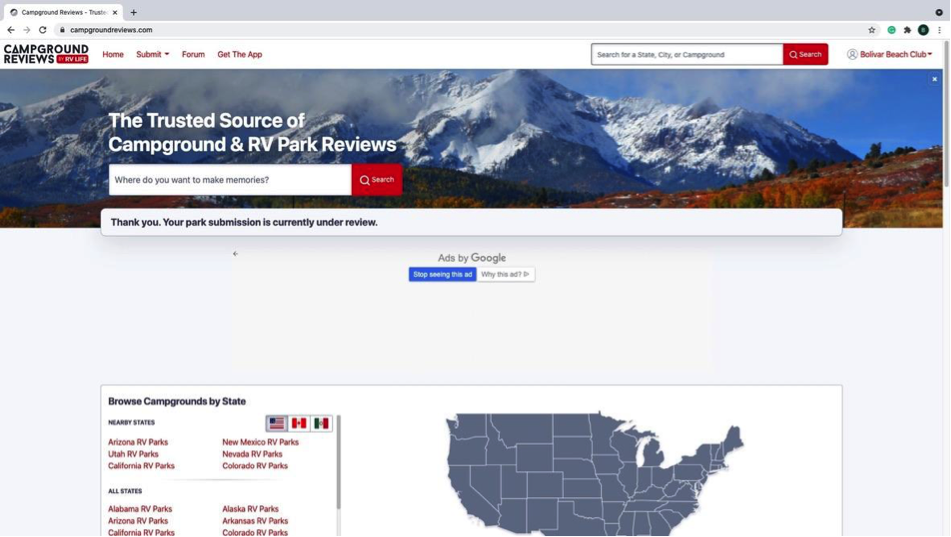
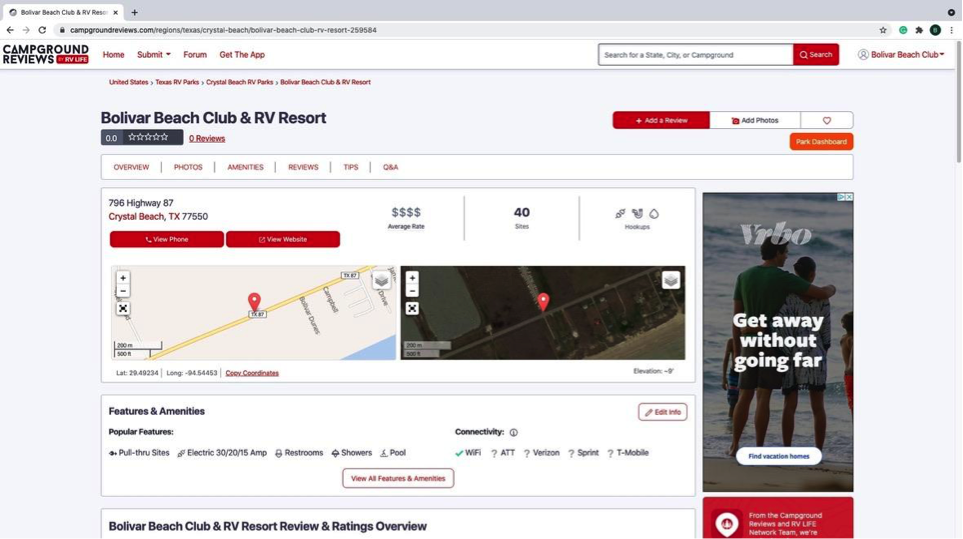
Step 5: After Approval, you will receive an email confirming your listing.
You can now login and update information about your listing on the site.
How to List Your Campground on Campendium
There are 6 easy steps to list your campground.
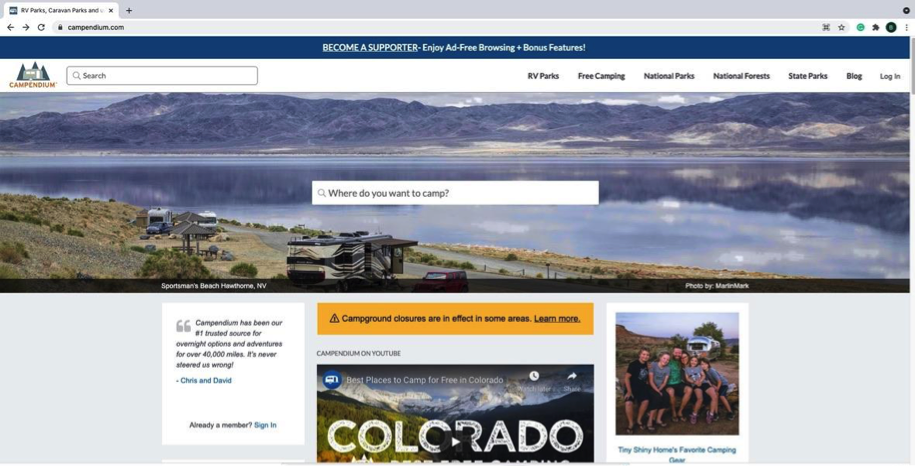
Step 1. Go to https://www.campendium.com/ and click “Log In” in the upper right-hand corner of the site.
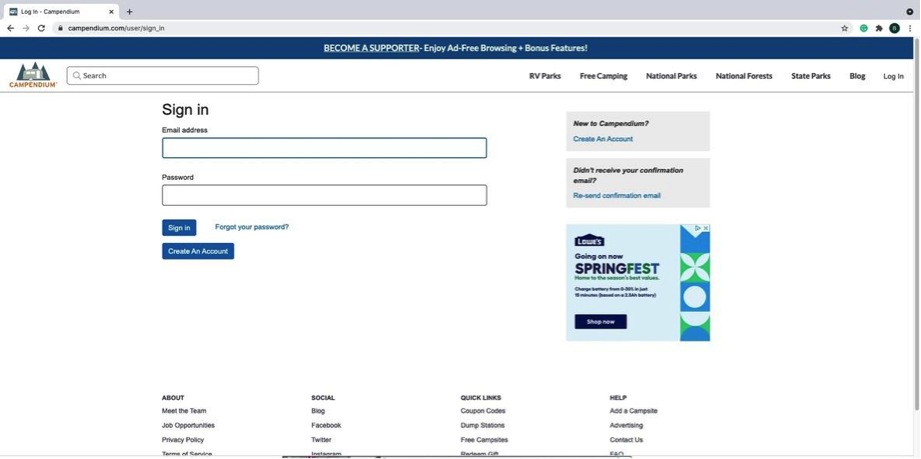
Step 2: Log In to your account.
If you do not already have an account, create one. If you are creating an account, you will receive a confirmation email shortly after creating an account and you will be asked to verify the account before moving forward.
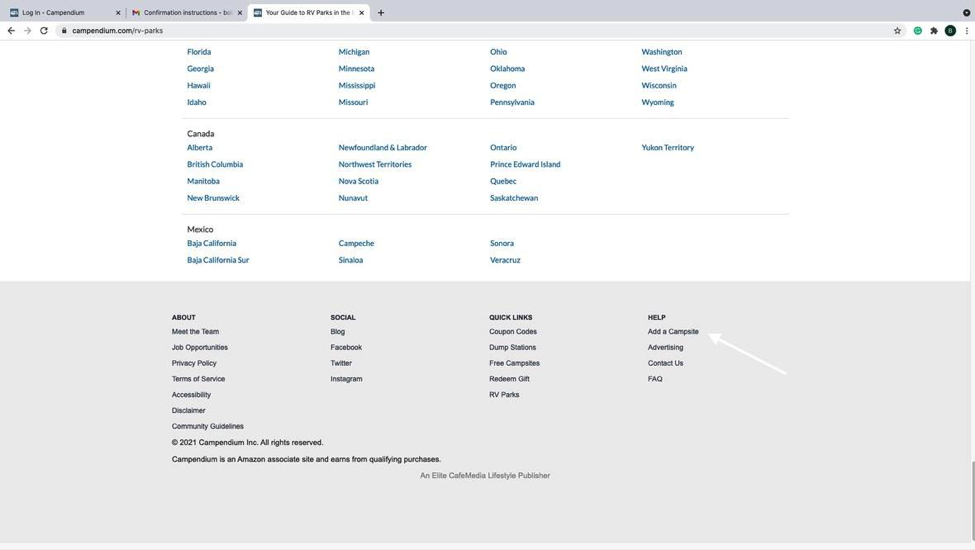
Step 3: Click on RV Parks on the Main Bar near the top center of the screen, scroll down to the bottom and click on “Add a Campsite”.
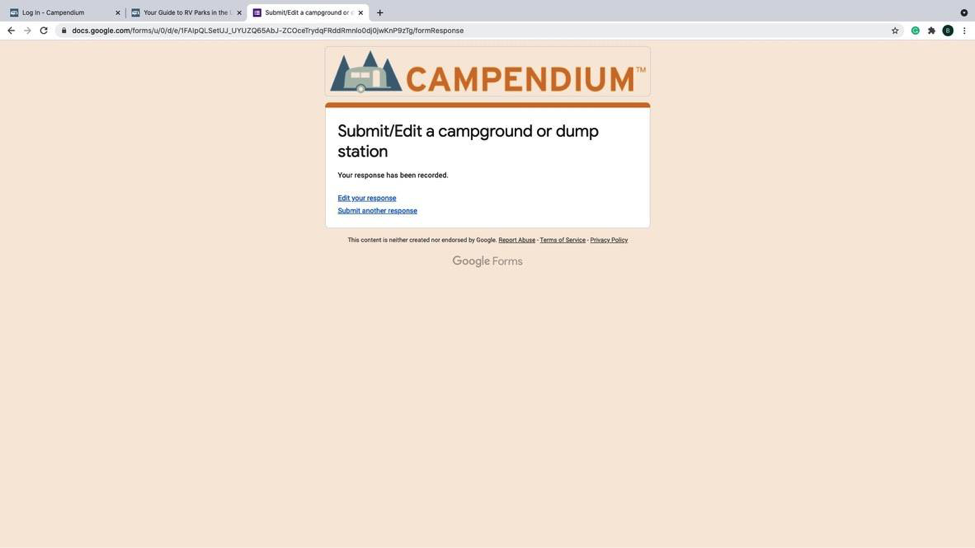
Step 4: You will be taken to a Google Form to Submit/Edit a campground or Dump Station.
Enter in all the fields and then proceed to click on submit at the bottom of the Page.

Step 5: You will receive an email when your campground has been listed.
You can edit the information you submitted in the form, but make sure everything is correct
before you leave the site.
Step 6: You will receive an email confirming your listing after review, or an email asking for more details from the Campendium team.